
Create a Tailscale Subnet Router
Lab Credits
Much of what is written here was gleaned from existing sources and then fit to my needs. Tailscales documentation is top notch and will be an invaluable resource.
- Credit: Tailscale themselves produce excellent documentation including a number of comprehensive "How-to" guides
- Link to Tailscale Docs
- Some changes have been made where my setup differs. For example, I use a VM on [Proxmox](/guides/proxmox/installation/)
Lab Overview - Goals + Objective + Technologies
In this project, we will create a subnet router using Tailscale on a Linux VM running on Proxmox. This router will allow you to route traffic between different subnets in your homelab and provide secure access to your devices using Tailscale.
Prerequisites
Section titled “Prerequisites”- A Proxmox server with a Linux VM or a device you’d like to use as a subnet router
- A Tailscale account
- Basic knowledge of networking concepts
Overview of What We’ll Cover
Section titled “Overview of What We’ll Cover”This project will walk you through the process of setting up a subnet router using Tailscale on a Linux VM. We will start by building a Linux VM on Proxmox, installing Tailscale on the Linux VM, and configuring the Linux VM as a subnet router. We will then route traffic between different subnets in your homelab and securely access your devices using Tailscale.
Setting Up a Subnet Router
Section titled “Setting Up a Subnet Router”Step 1: Build a Linux VM on Proxmox
Section titled “Step 1: Build a Linux VM on Proxmox”If you haven’t done so already, build a Linux VM on Proxmox. You can follow the steps outlined in the Linux VM on Proxmox guide to get started.
Step 2: Install Tailscale on the Linux VM
Section titled “Step 2: Install Tailscale on the Linux VM”Once you have your Linux VM set up, install Tailscale on the Linux VM.
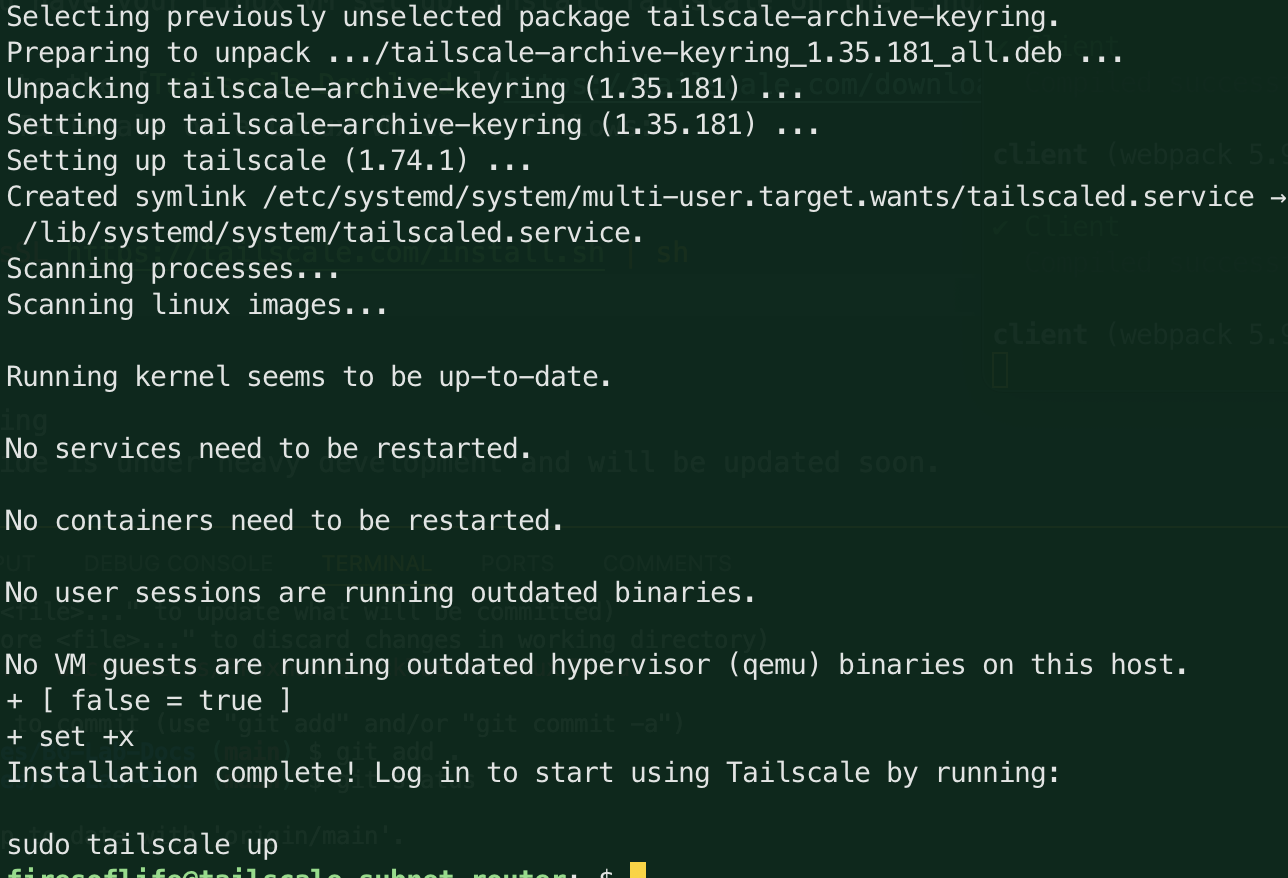
- Head to the Tailscale Downloads page and download the Tailscale package for your Linux distribution. At the present time, the command to install Tailscale on a Linux VM is as follows:
curl -fsSL https://tailscale.com/install.sh | sh- The terminal will print a bunch of information and should end with a message that Tailscale is installed:
- Next, you will need to authenticate your Linux VM with Tailscale. Run the following command:
sudo tailscale upThis will generate a URL that you can use to authenticate your Linux VM with Tailscale. Open the URL in a browser and follow the instructions to authenticate your Linux VM.
If successful, you should see a message in the broser that your Linux VM is now connected to Tailscale and then a redirect to your Tailscale admin console where you can see your Linux VM listed.
Step 3: Check Your Firewall Settings
Section titled “Step 3: Check Your Firewall Settings”- First check to see if your firewall is enabled. Run the following command to check the status of your firewall:
sudo ufw status-
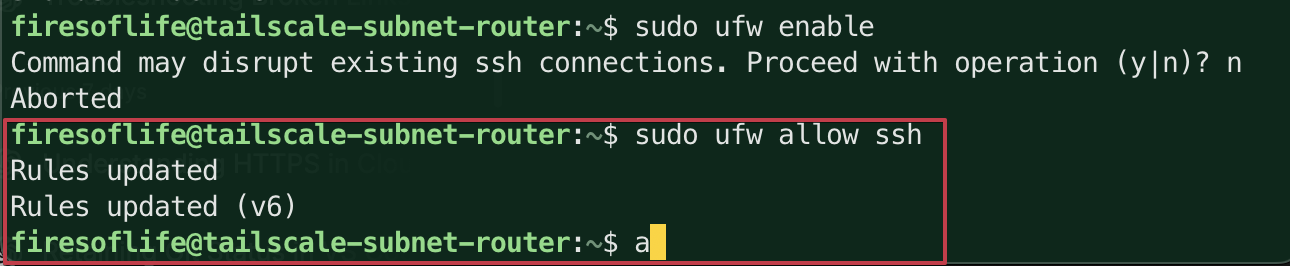
If your firewall is not enabled, you can enable it, but you’ll want to ensure you can still access your Linux VM. You can do this by allowing SSH traffic through the firewall. Run the following command to allow SSH traffic:
Terminal window sudo ufw allow sshYou should see a message that the rule has been added:
-
Now you can enable the firewall by running the following command:
Terminal window sudo ufw enableYou can safely enter
yto enable the firewall and you should see a message that the firewall is now active and will start on boot and you should still be able to access your Linux VM via SSH:
-
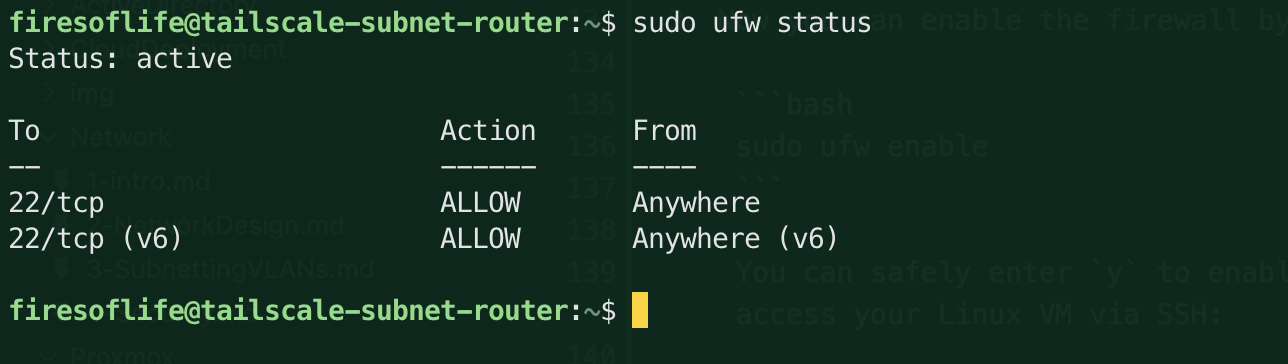
Verify that the firewall is enabled by running the following command:
Terminal window sudo ufw statusYou should see a message that the firewall is active and that SSH traffic is allowed:
Step 4: Enable IP Forwarding
Section titled “Step 4: Enable IP Forwarding”Here’s the thing about a subnet router: it isn’t really a Tailscale feature so much as a Linux one that Tailscale knows how to drive. The VM has to be willing to accept a packet on one interface and pass it out another. Out of the box, Linux refuses — it’ll happily talk to you, but it won’t act as a middleman.
So we turn that on:
echo 'net.ipv4.ip_forward = 1' | sudo tee -a /etc/sysctl.d/99-tailscale.confecho 'net.ipv6.conf.all.forwarding = 1' | sudo tee -a /etc/sysctl.d/99-tailscale.confsudo sysctl -p /etc/sysctl.d/99-tailscale.confWriting to /etc/sysctl.d/ rather than editing /etc/sysctl.conf means this survives
reboots and stays in its own file, so it’s obvious later what put it there and why.
Verify it took:
sysctl net.ipv4.ip_forwardYou want net.ipv4.ip_forward = 1. If you get 0, the sysctl -p didn’t apply — re-run it
and check for a typo in the filename.
Step 5: Advertise Your Subnet
Section titled “Step 5: Advertise Your Subnet”Now we tell Tailscale which slice of your network this VM is willing to hand out.
First — and don’t skip this — confirm what your subnet actually is:
ip -4 addr show | grep inetip route | grep defaultYou’re looking for the CIDR range your lab lives on. Mine is 10.2.1.0/24, so that’s what
you’ll see throughout this guide. Yours is probably different — 192.168.1.0/24 and
192.168.0.0/24 are the common home-router defaults. Substitute yours everywhere you see
mine or nothing will work and you’ll be very cross with me.
sudo tailscale set --advertise-routes=10.2.1.0/24You can advertise more than one range at once, comma-separated and no spaces:
sudo tailscale set --advertise-routes=10.2.1.0/24,10.2.2.0/24Check that the node is offering them:
tailscale statusNothing visible will have changed yet on your other devices. That’s expected — you’ve made an offer, and nobody has accepted it.
Step 6: Approve the Route in the Admin Console
Section titled “Step 6: Approve the Route in the Admin Console”This is the step that trips up nearly everyone, because the CLI gives you no indication it’s needed. Advertising a route is a request. Until you approve it in the admin console, Tailscale ignores it completely.
It’s a deliberate safety valve: advertising 10.2.1.0/24 means exposing every device on
that range to your tailnet, so Tailscale makes you confirm you meant it.
- Open the admin console and go to Machines.
- Filter with
property:subnetto show only nodes advertising routes — handy once you have more than a handful of machines. - Click your subnet router, find the Subnets section, and hit Edit.
- Tick the routes you want under Subnet routes, then Save.
The machine should now show a Subnets badge listing your approved range.
Step 7: Disable Key Expiry (Do Not Skip This)
Section titled “Step 7: Disable Key Expiry (Do Not Skip This)”By default, every node’s key expires after 180 days. When it does, the device drops off the tailnet and stays off until someone reauthenticates it by hand.
For your laptop that’s a minor annoyance. For the box that is your remote access, it means your remote access dies roughly six months from now, almost certainly while you’re away from home and need it most, and with no obvious clue why.
Tailscale’s own documentation recommends disabling expiry for “trusted servers, subnet routers, or remote IoT devices that are hard to reach”. A subnet router is all three.
- Machines → find your subnet router’s row.
- Open the menu at the far right of the row (the
...). - Choose Disable key expiry.
The row should now read Expiry disabled.
Step 8: Tell Your Other Devices to Use the Route
Section titled “Step 8: Tell Your Other Devices to Use the Route”Approving a route advertises it to the tailnet. Whether a given device uses it depends on the platform:
- Android, iOS, macOS, tvOS, and Windows pick up approved subnet routes automatically. Nothing to do.
- Linux does not. It needs to be told:
sudo tailscale set --accept-routesThat asymmetry is not obvious and costs people a lot of time. If your phone can reach the subnet but your Linux desktop can’t, this is why.
Step 9: Test It Properly
Section titled “Step 9: Test It Properly”Here’s the mistake I made the first time, and the reason this step gets its own heading.
From a device on your tailnet that is not on your home network — phone on cellular is the cleanest test — try to reach something on the subnet:
ping 10.2.1.1Use the IP of a device that does not have Tailscale installed. Your router, a printer, a NAS, an IP camera — anything that’s on the LAN but not on the tailnet.
If it answers, you’re done. You now have a route into your lab from anywhere, without port-forwarding anything, without a static IP, and without exposing a single service to the open internet.
Try the thing you actually wanted this for — Proxmox on 10.2.1.x:8006, your NAS, whatever
sent you down this path in the first place.
Troubleshooting
Section titled “Troubleshooting”Ping times out from a remote device.
Work down the chain. On the router: sysctl net.ipv4.ip_forward should be 1, and
tailscale status should show it online. In the admin console, the route should be approved
and showing on the Machines page. On a Linux client, tailscale set --accept-routes should
have been run. Then check the target device’s own firewall — a Windows box will often ignore
pings from a subnet it doesn’t consider local.
It worked, then stopped weeks or months later. Key expiry. See Step 7. This is the single most common way a working setup dies quietly.
Everything on the subnet answers except one machine. Not a Tailscale problem. That host’s firewall or its default gateway is the culprit — it may not know how to route replies back.
Your subnet overlaps with the network you’re connecting from.
If your lab is 192.168.1.0/24 and the café wifi is also 192.168.1.0/24, the two collide
and routing gets ambiguous. This is the best argument for putting your lab on something less
common — 10.2.1.0/24 in my case — and it’s worth doing before you’re troubleshooting it
from a hotel.
You need the return path, not just the outbound one.
By default Tailscale SNATs traffic so devices on your subnet see it as coming from the router
and reply correctly without knowing Tailscale exists. If you turn that off with
--snat-subnet-routes=false — Linux routers only — those devices need a route back to
100.64.0.0/10 or their replies go nowhere. Leave SNAT on unless you have a specific reason.
Where to Go Next
Section titled “Where to Go Next”A subnet router gets you to your network. An exit node sends all your traffic through it — useful on untrusted wifi, and a different job entirely. The same VM can do both:
sudo tailscale set --advertise-exit-nodeIt needs its own approval in the admin console, same as a subnet route. I’ll write that one up separately.
Worth exploring from here: MagicDNS, so you can use hostnames instead of memorising
10.2.1.x; and ACLs, for when you want the subnet reachable by you but not by every
device you’ve ever added to the tailnet.